
A salt dough map lesson plan makes an excellent addition to any geography unit! These maps give children a hands-on way to learn and remember the geography of any given area.
What is salt dough?
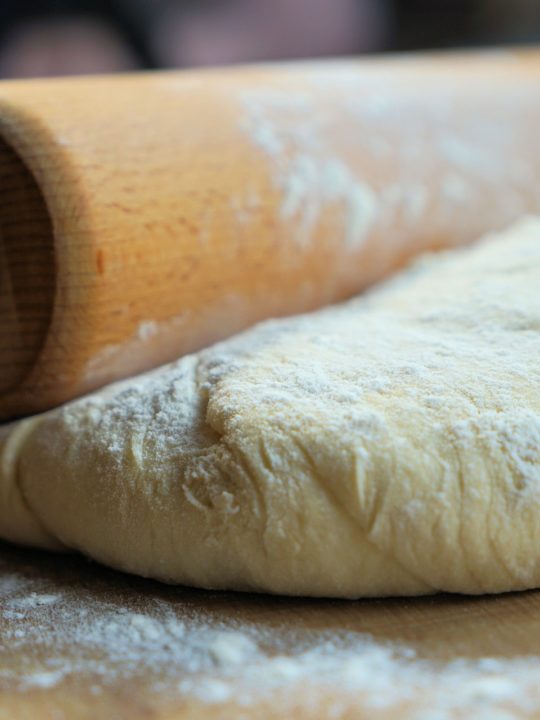
Salt dough is a simple three-ingredient dough that uses water, flour and a high amount of salt. Salt acts as a preservative that discourages mold growth and allows the dough to last a long time.
In addition to maps, we use salt dough to make Christmas tree ornaments, sculptures and other crafts. It’s a very versatile molding material!
How do you make salt dough?
Salt dough is easy to assemble. You can knead it by hand or prepare it in a stand mixer. Just combine the three ingredients in the proportions listed below and knead it until the mixture is smooth and pliable.

Salt Dough (non-edible)
Course: CraftsDifficulty: Easy4
servings15
minutes1
hourSalt dough is a simple, pliable molding material for crafts. It can be used to create maps, ornaments, sculptures and more!
Ingredients
All-Purpose Flour (2 Cups)
Salt (1 Cup)
Cold Water (1 Cup)
Directions
- Mix flour and salt together in a bowl.
- Add half of the water immediately. Continue adding water, two tablespoons at a time, while kneading the dough into a smooth consistently.
- Knead dough for about 5-10 minutes until smooth and consistent. The dough should be soft and easy to handle. If it is too hard or dry, add a little more water. If it is sticky, add more flour. Continue adjusting and kneading until the dough is easy to handle. It should feel like Play-Doh.
- Form dough into desired shapes. Arrange on a baking sheet.
- Preheat the oven to 250 degrees.
- Bake in the preheated oven until dry and hard. This usually takes 45-120 minutes depending on the thickness of the project.
- Cool completely before painting.
Did you make this recipe?
Tag @thatweirdfamily on Instagram and hashtag it #thatweirdfamily
Like this recipe?
Follow us @thatweirdfamily on Pinterest
Did you make this recipe?
Like us on Facebook
How do you make a Salt Dough map lesson plan?
Before we begin our salt dough map project, I like to watch a documentary on the landscape and layout of the country we are studying. We talk about climate and major geographic features so that these things are familiar before we begin the project. This helps reinforce the project and make it more impactful, because the children are already familiar with what they are creating.
Before teaching a salt dough map lesson, it helps to have a few things on hand:
- Prepared salt dough
- Baking sheets (or parchment paper, or another work surface)
- Outline of the country (one per student)
- Topographical country map
- Toothpick flags (see below)
- Permanent Marker
- Toothpicks
Start by finding a large workspace for everyone to work on. We prefer baking sheets, but some of my friends swear that pizza boxes are the best way to go. Since baking is the best way to dry salt dough, it really helps to use parchment paper underneath your project if you choose a flammable surface like a pizza box. That way, you can lift the project out of the box for baking. You can always cut away excess parchment paper after baking.
Print a large outline of the country that you will be creating. Each student will need one. Don’t worry about filling in topographical features like mountains, valleys and rivers. Just a simple, bold outline is good enough.
Students will trace this map onto their working surface. I like to lay a sheet of parchment paper over the printed sheet and copy it with a permanent marker.
Since I teach five children at a time, I use one large topographical map of the country as a guide for creating the maps. We identify mountain ranges and create those together. We use our fingers to create valleys and toothpicks to carve rivers.
As we move through the different geographical formations, we name them and label them using toothpick flags. The toothpick flags are made by taping labels to toothpicks. Of course, these labels have to be removed before baking.
Once the maps are completed, they must be baked before painting. This can take up to an hour or longer, depending on the thickness of the maps you’ve created. You will know when the maps are done because they will be firm to the touch.
While the maps are baking, we listen to music from the country we are studying. Alternatively, you could read stories, watch documentaries or cook a recipe.
When the baking is complete, we wait for the maps to cool and then paint them. It is best to use tempera or acrylic paint on salt dough maps.
To limit the mess in the house, we usually paint multiple projects at the same time (like a flag or other art project). That’s just a personal preference because I don’t like messy projects.